Before we start
Do notice you will need to pay around $3-10 to register any usual domain yearly.
But I think it’s so worth it!

Let’s do it
The process should be fairly simple. It will take around 30-45 mins to finish.
We will be using namesilo to register domain names, and cloudflare for domain name resolution.
1. Registering a domain
Go to namesilo.
Sign up. If they ask for things like home address, you don’t need to fill out your real info. Just put something on there.
After having your account ready, go back to the home page. Search your desired domain name.
Note that some universities or places blocks certain domain ending with some specific letters. For example, Cornell blocks all website ending with .xyz. So make sure you register a good domain name.
Let’s say I search my own domain emerisly as an example.
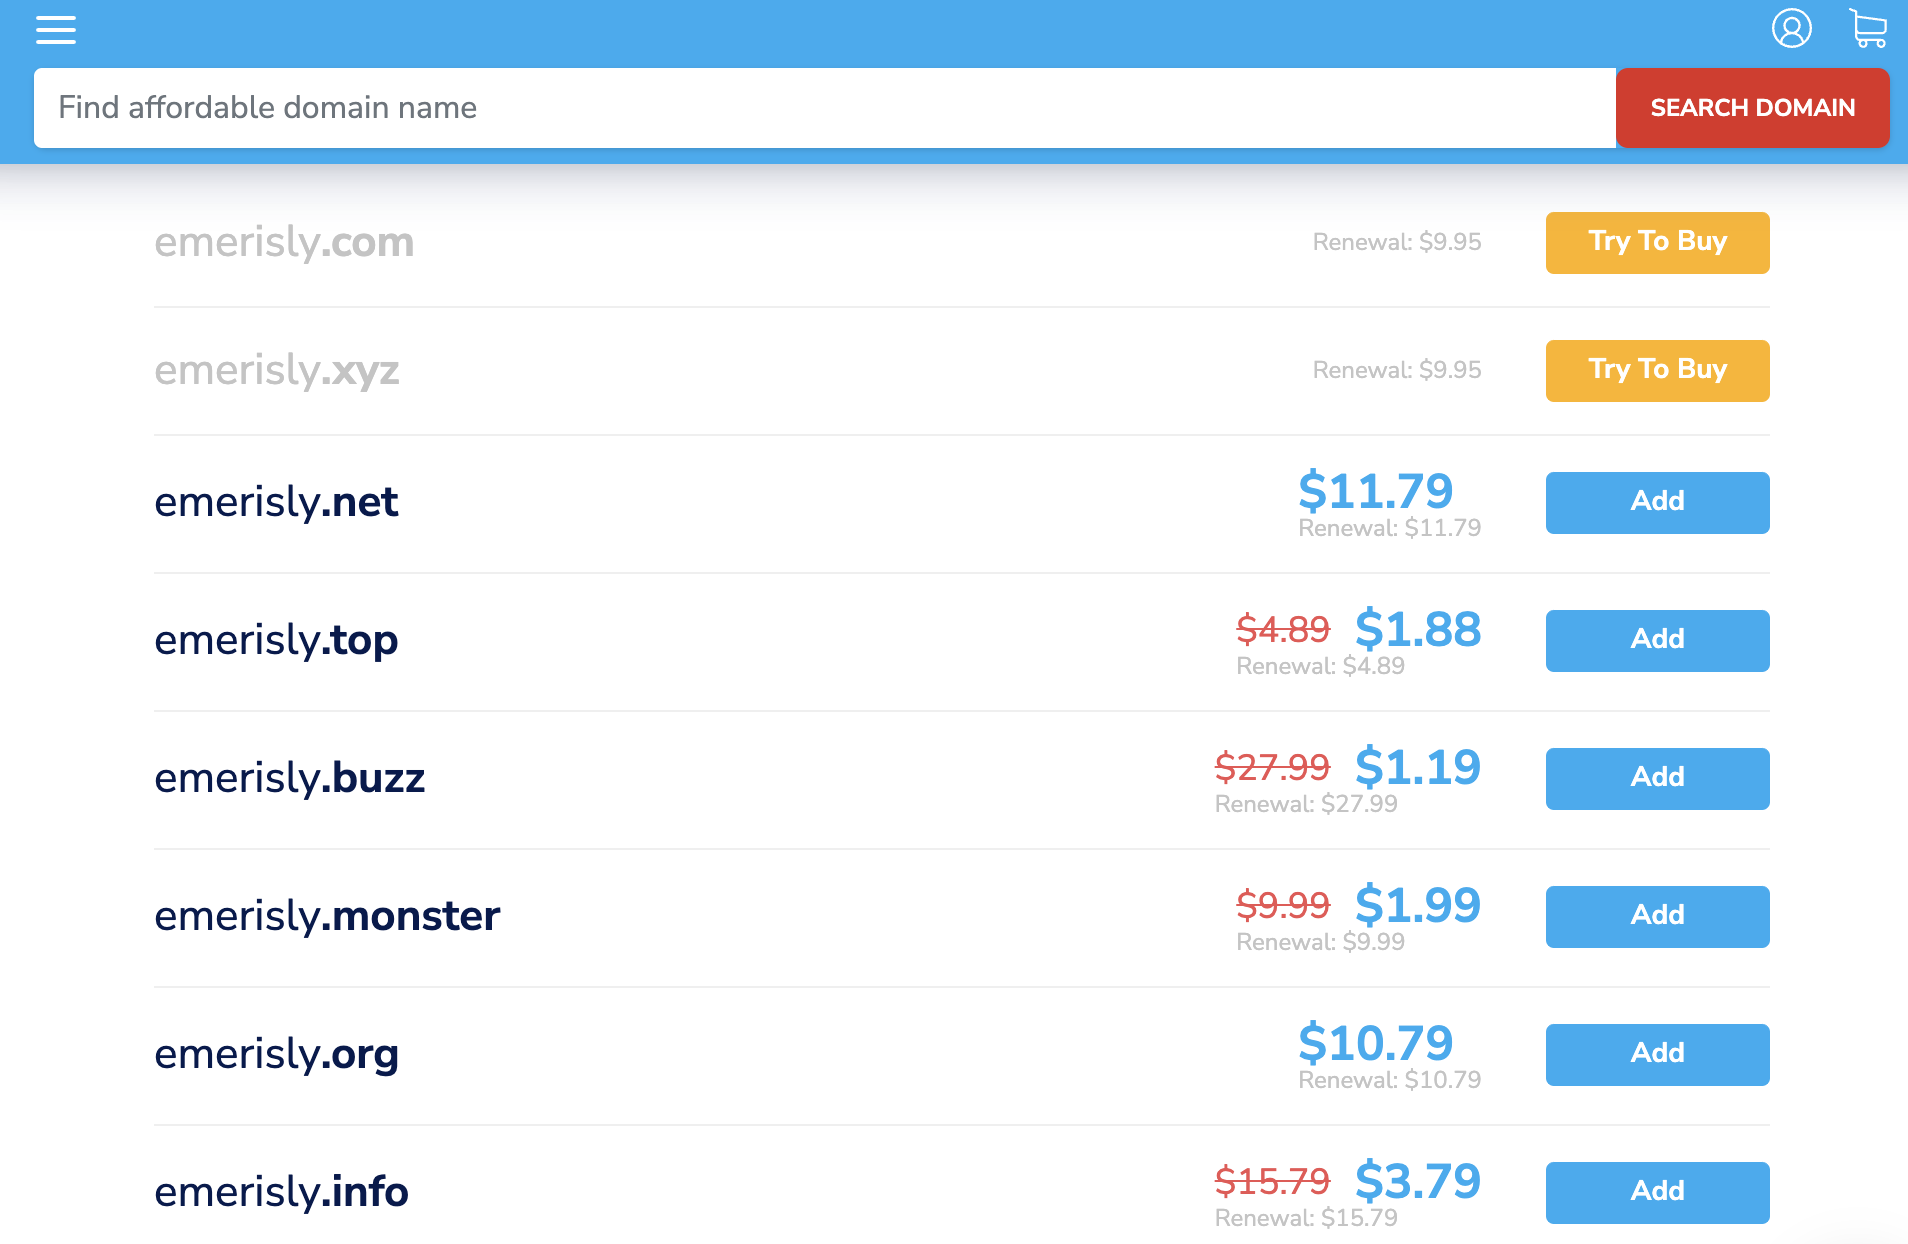
Click on Add, and then Checkout.
Checkout directly, and continue to pay with whatever methods you prefer.
2. Unlock domain
We will now need to unlock the domain that we just register so we can resolute it later.
Go back to namesilo’s account home.
You should see that you have 1 account domains now. Click on the 1.

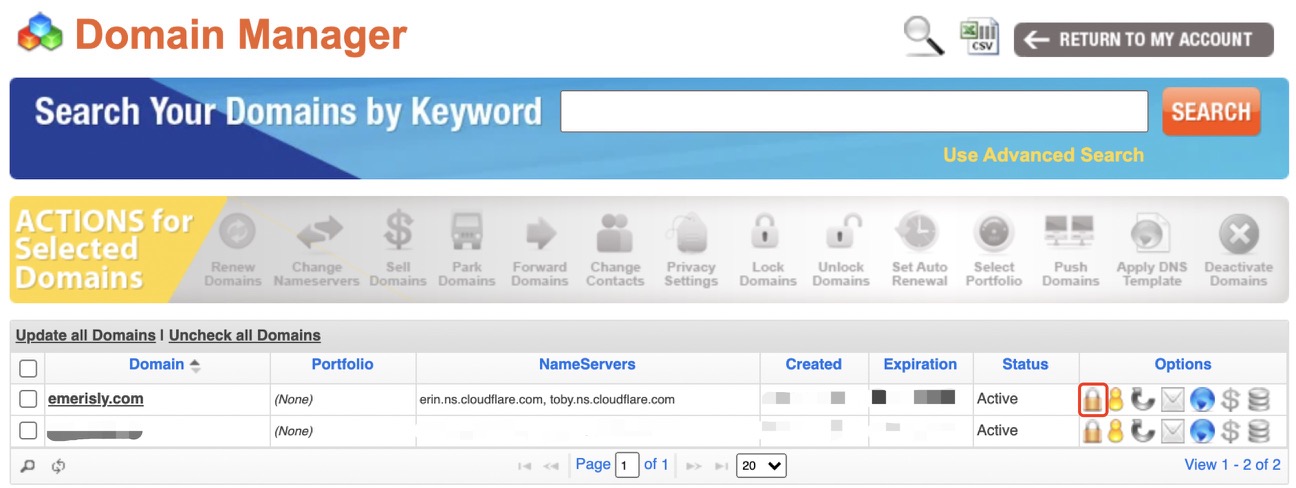
You will be re-direct to the domain manager. You should see your domain name here.
Now we want to unlock the domain. Click on the lock icon as shown below.
The domain status will then become “Processing”. We can just ignore it right now and let it finish while we continue with cloudfare.
3. Domain resolution
Domain resolution means converting domain names into IP address. After this, our new domain will re-direct to our github.io.
Go to cloudflare and sign up.
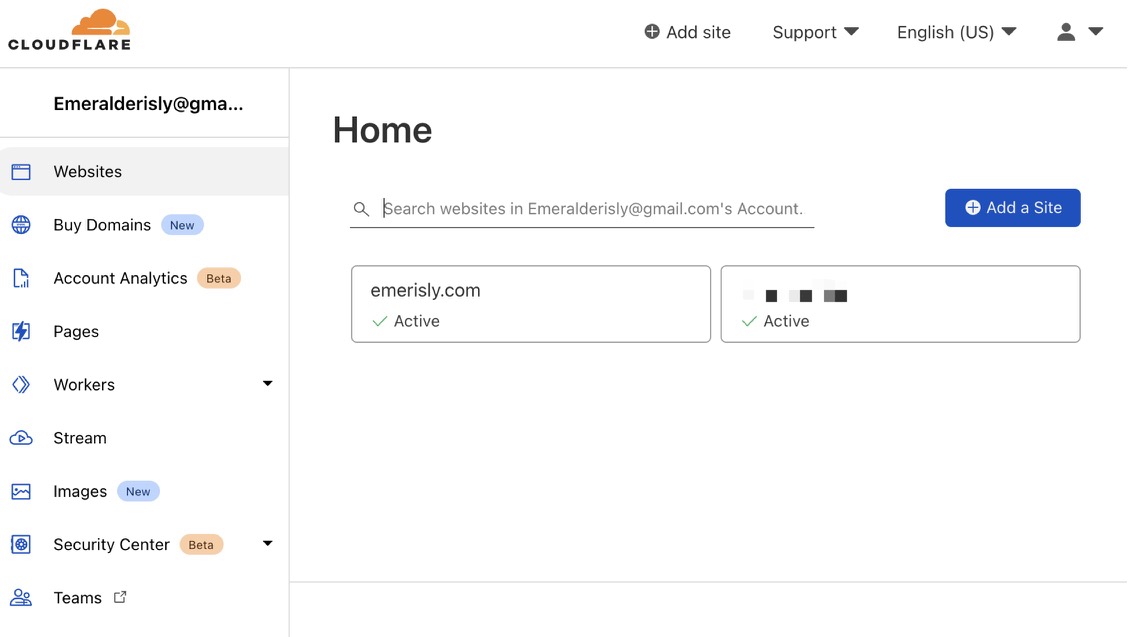
After having logged in, you should see something like this. Click on “Add a Site”.
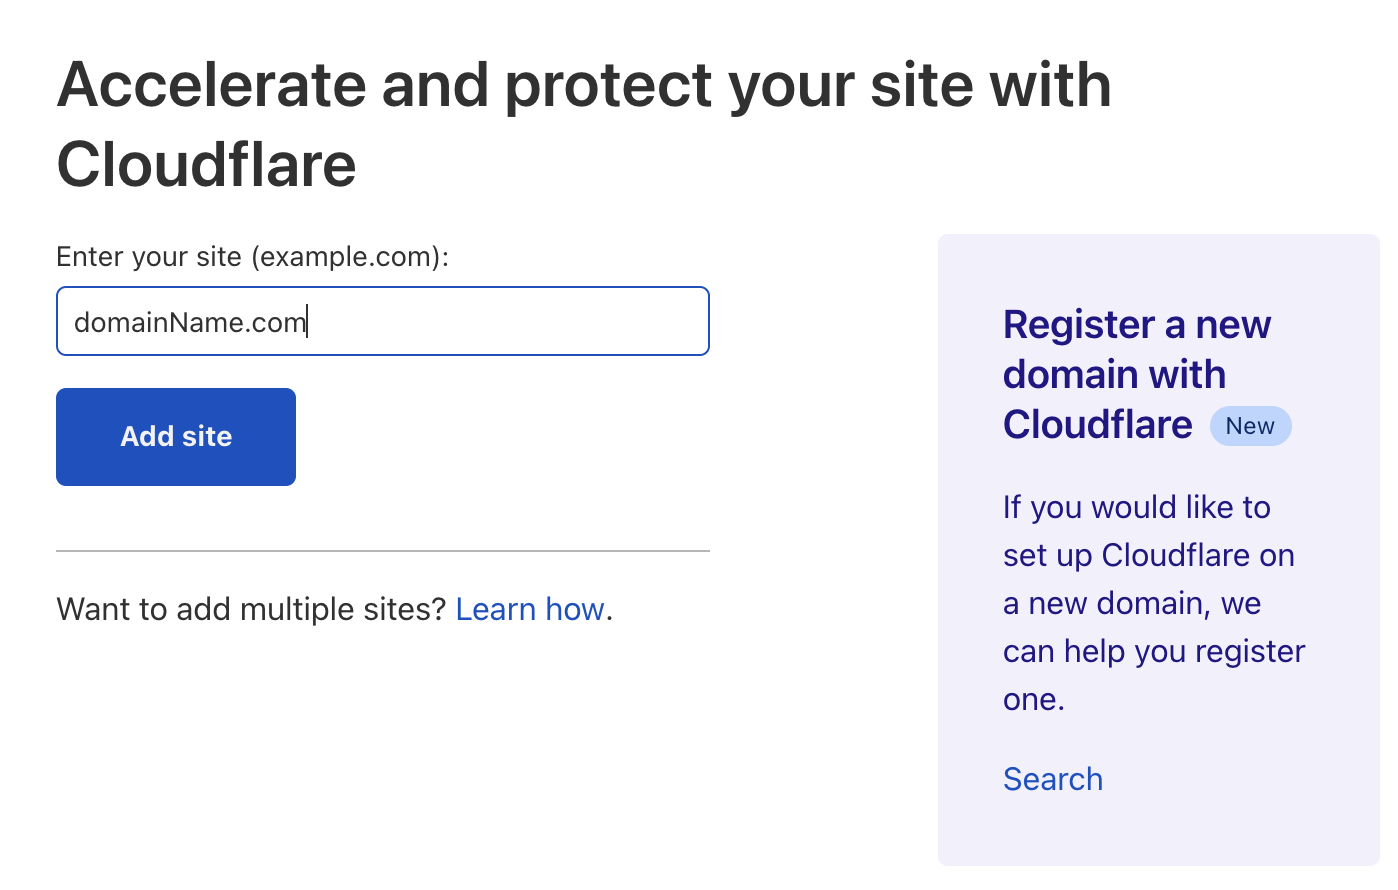
Now enter your sitename and click on “Add Site”.
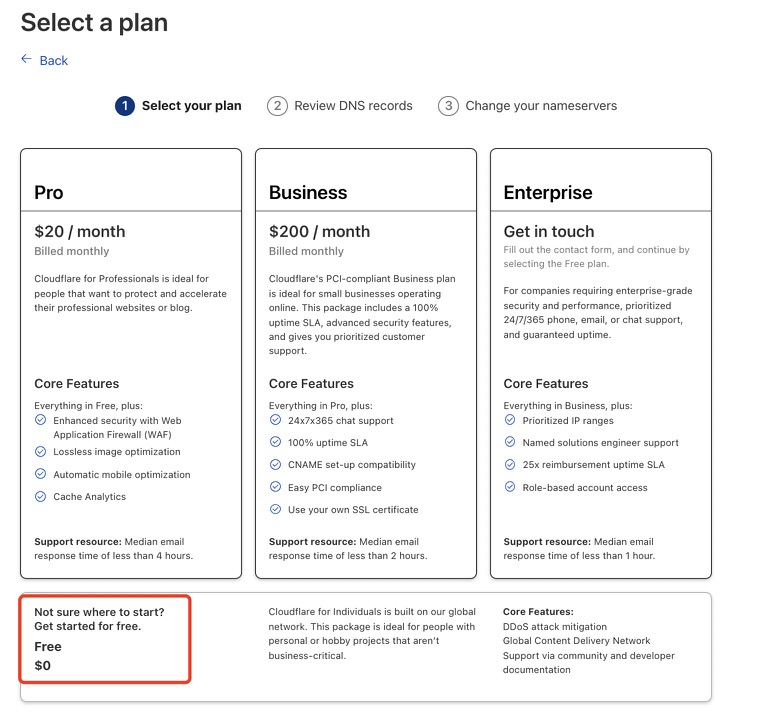
On this select a plan page, scroll down and select the “Free” plan.
Now cloudfare should automatically bring you to a page like this.
Click on “Add record”.
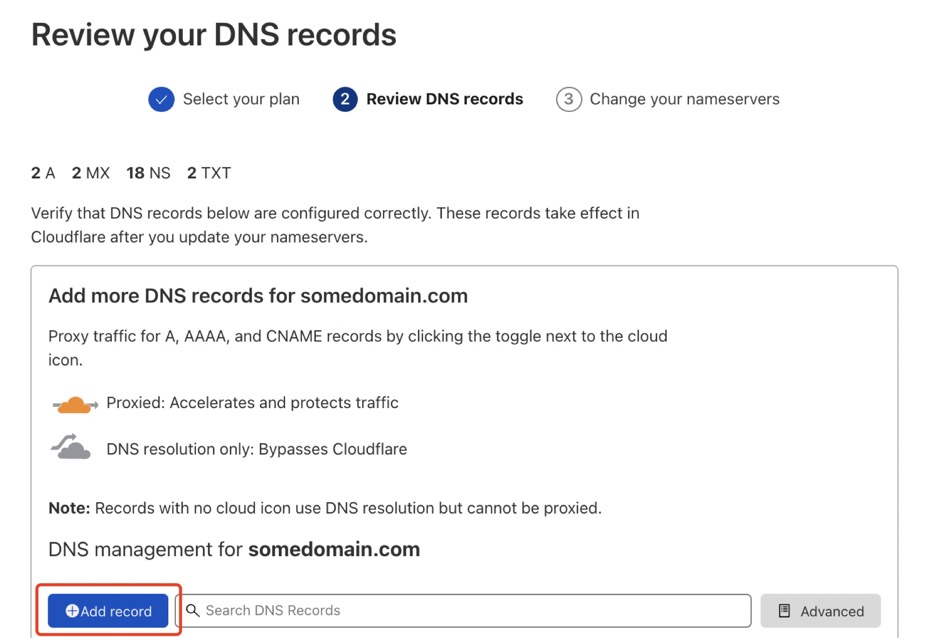
If cloudfare recommend any setting during the process, use click ok.
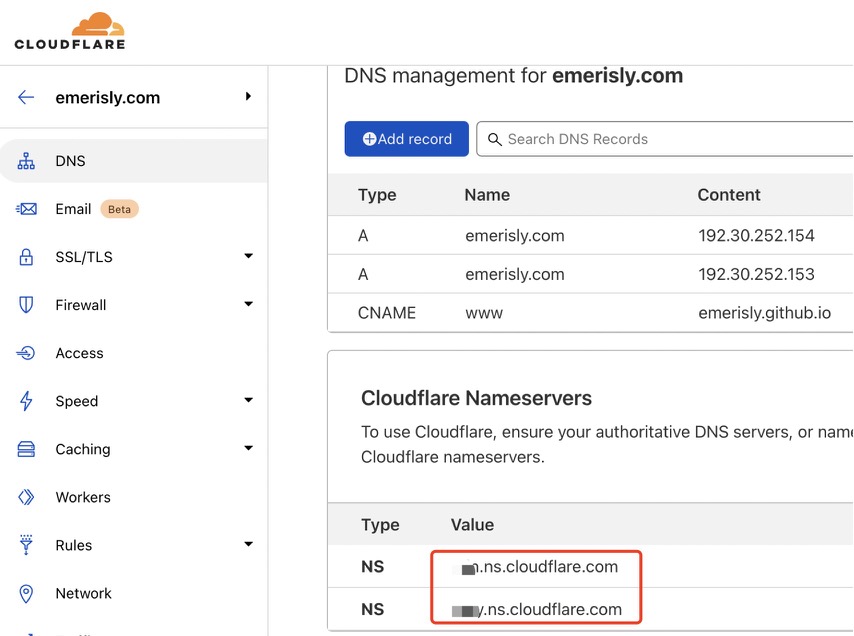
We will now need to add three different record.
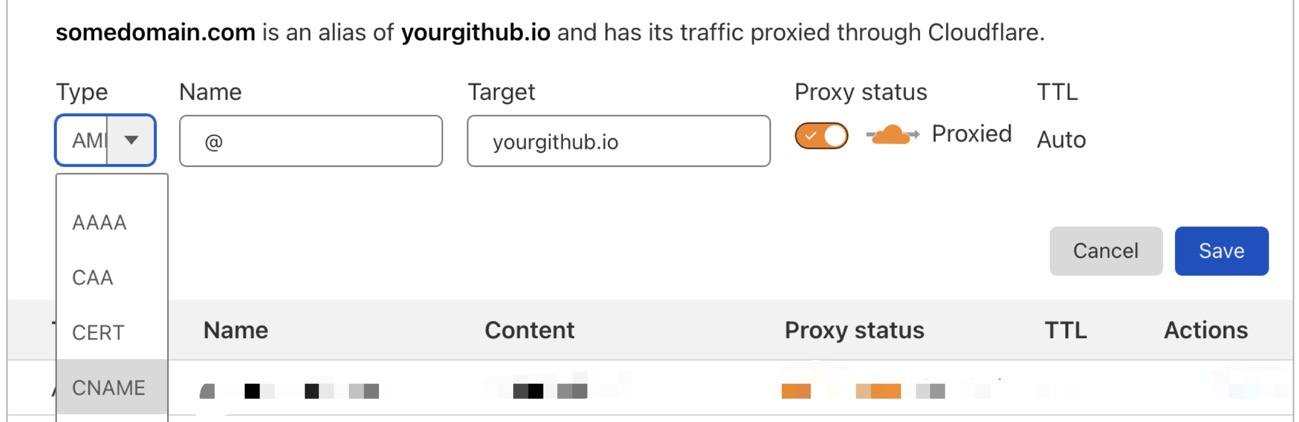
First, select “CANME” for type, for name you can use @ or www. It doesn’t matter that much. Put your githubUsername.github.io for content.
Second, select “A” for type, for name put your full domain name. Fo content put 192.30.252.153.
Third, same as the second, A and domain, for content put 192.30.252.154.
You should now have something like this.
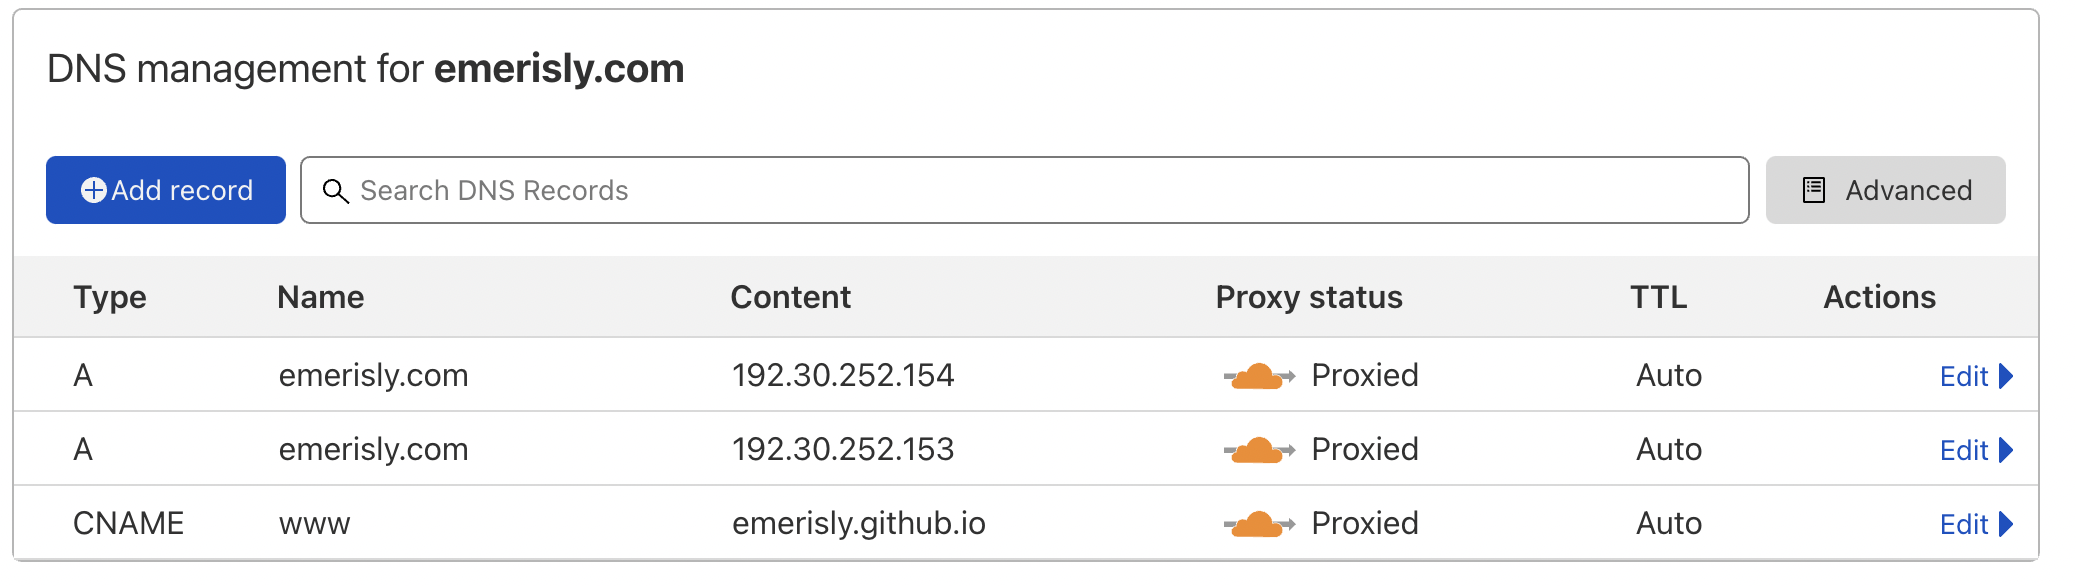
some notes on what these mean
Type: A - point domain to IPv4 address (e.g 8.8.8.8)
Type: CNAME - point domain to other domain
Name: www - after resolution, the domain will be www.xxx.com
Name: @ - after resolution, the domain will be xxx.com
Name: * - after resolution, the domain will include all prefix *.xxx.com
4. Changing Nameservers
After finishing adding all the records, we need to change the nameservers.
Still in cloudflare’s DNS. Scroll down and you will see something like this.
Copy both the values here.
Now go back to namesilo’s domain manager.
Check your domain, and click on Change Nameservers.

Use the two values servers you just copied.
It should looks something like this.
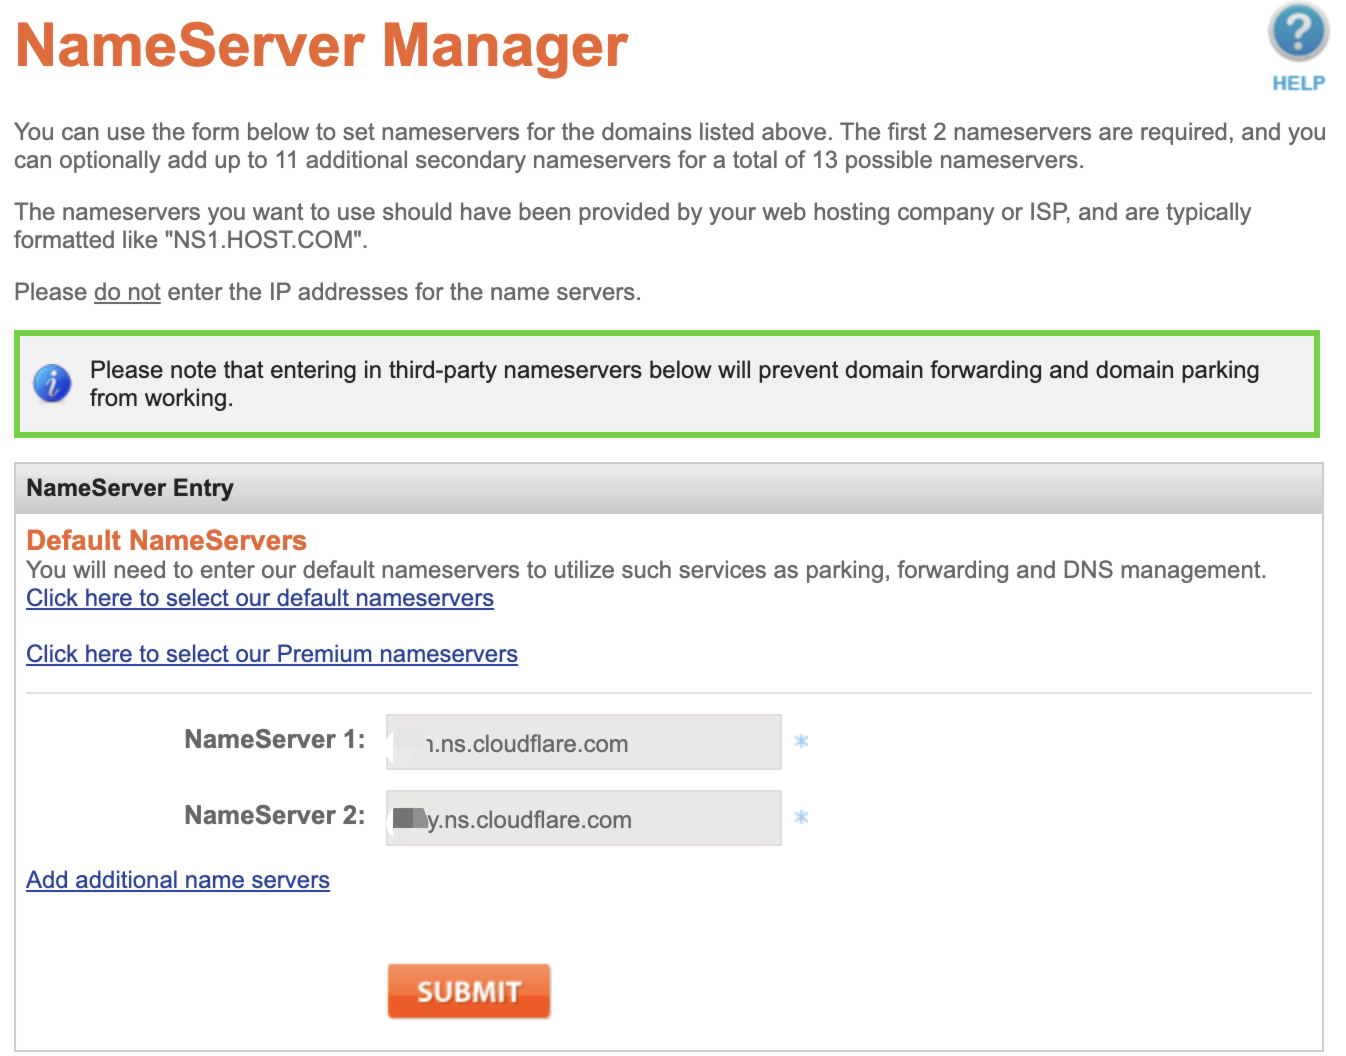
Hit submit. After processing successfully, re-lock the domain.
5. Github CNAME setting
We are almost done now!
We just have the final last two but also important steps.
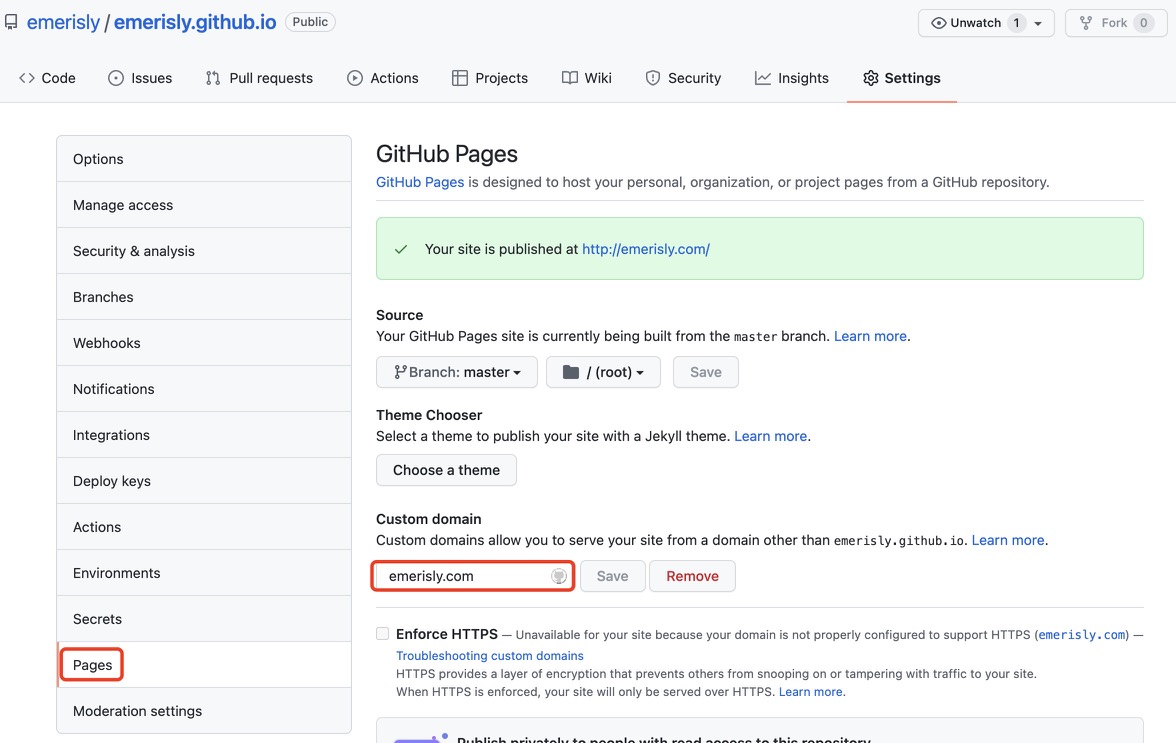
First go back to your github.io repo.
Go to setting, click on Pages, and add your domain name to custom domain. Click save.
Now go to your local blog folder. Find and open the source folder.
Under the source directory, create a new file called CNAME (blank file extension).
Inside the file, write your domain name.
Mine looks like this:

Why editing CNAME on both cloudfare and the local file: need both cloud access to process resolution and local approval to process resolution.
You are all good to go.
Go visit your new blog with your personalized domain url!
The End
Thanks!

- Post link: http://example.com/2022/01/08/blog-with-personal-url/
- Copyright Notice: All articles in this blog are licensed under unless otherwise stated.